VirtualBox – Move Virtual Machines (VM) and Virtual Disks (VDI)
When you use an guest operating system in VirtualBox, you create two kinds of assets: virtual machines (VM) and virtual disks (VDI). Virtual Machines, typically with the file extension *.vbox, contain information about CPUs, memory, network & sound cards, etc, while virtual disks contain the actual guest operating system.
You can store and move VMs independently of VDIs — you can store all your VMs in one directory and all your VDIs in another, and then you can change your mind and start moving things around. And this “moving things around” is where the trouble starts.
VirtualBox creates a unique identifying number (UUID) for every a VM or VDI it creates, and it remembers where that asset is located. If you move a VM or VDI with Finder or Explorer, VirtualBox gets confused and will give you a UUID error when you try to use the VM or VDI in its new location.
There are several ways to move a VirtualBox VM and/or VDI. Many descriptions require that you edit the XML files where the UUIDs are stored to avoid getting a UUID error. There a much easier way.
The drive that my VDI is on is getting crowded, and I want to move the VirtualDisk to a different drive. And while I am at it, I want the Virtual Machine (VM) that uses that virtual disk (VDI) to be in the same location as the VDI.
I am using VirtualBox 4.1.20 on a Mac Host.
To move a Virtual Machine, you start by opening the VirtualBox Manager. This GUI handles the information about each VM. It does not manage the virtual disks, only the virtual machines that use the disks. To manage the disks, you use the Virtual Media Manager. We will get to that later.
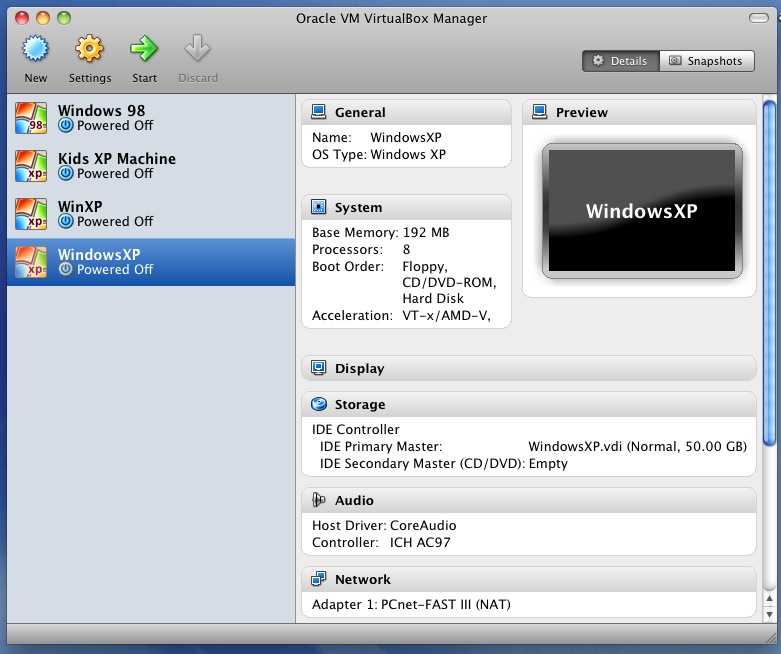
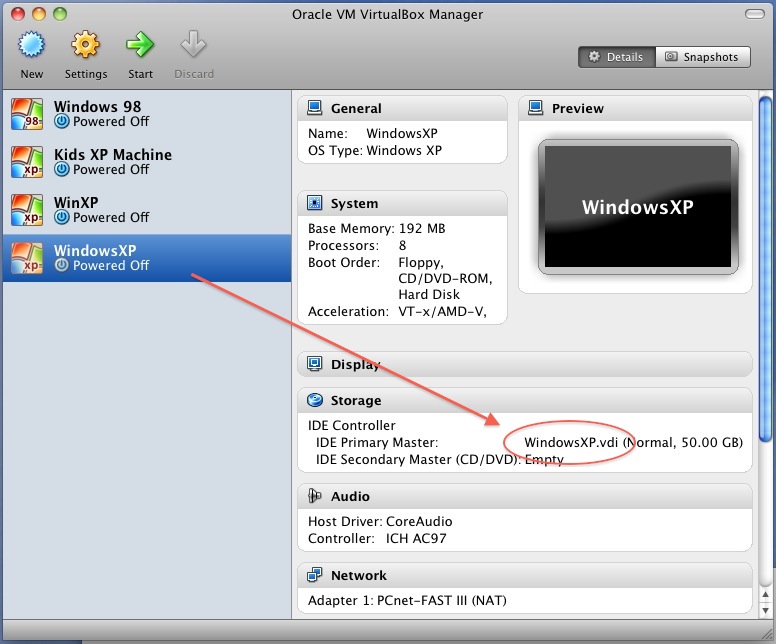
I want to move the VM called WindowsXP (selected in blue in the following image).
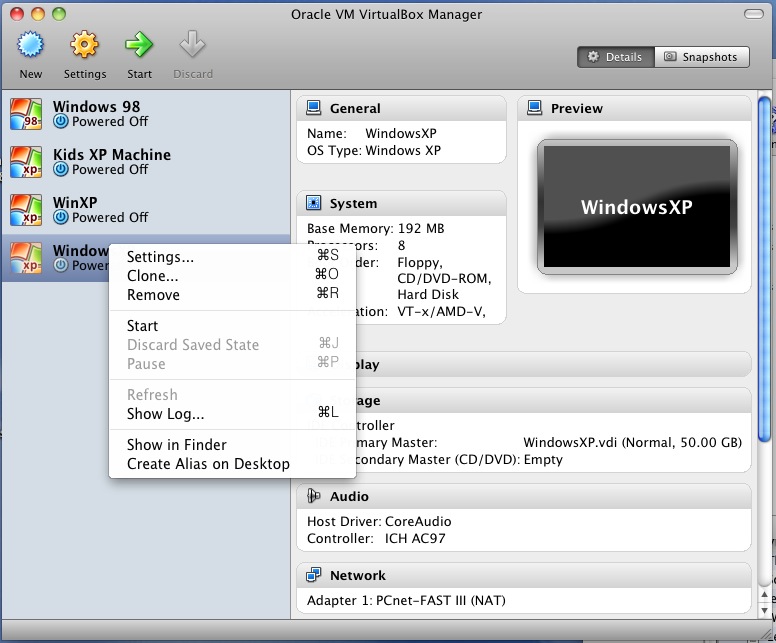
The first thing I am going to do is Right-Click the VM I want to move and select “Show in Finder” from the menu (see image below)
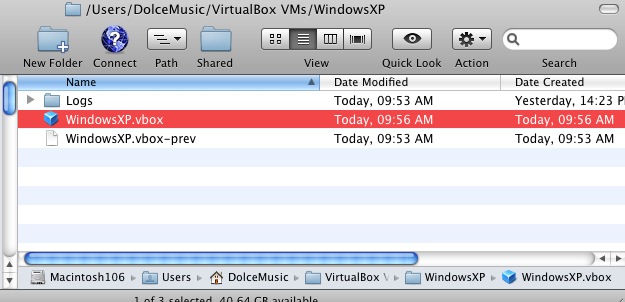
You will now have an open window showing you the folder that contains a file called “(virtual machine name).box” In my case, because that name of the VM is “WindowsXP,” my directory looks like this:
I recently had the experience of being unable to find the VM I wanted to move, because I had forgotten this step and my naming strategy was poorly planned. I had several old VMs with the same name that I had long ago removed from VirtualBox but failed to delete.
Now that you know where your VM is, you can remove it from VirtualBox’s records. You will only remove VirtualBox’s knowledge of the VM, you will not remove the VM itself.
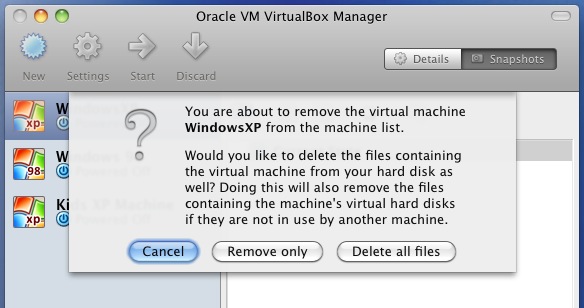
Again, Right-Click the VM you want to move. Now select the menu item “Remove,” and you will next see the following message:
Clicking “Remove only” will delete information about the Virtual Machine (VM) from VirtualBox Manager, but it will not delete the machine itself. Clicking “Delete all files” WILL delete the entire VM folder from your host computer.
I want to move my VM, so I will click “Remove only.”
Now go back to the directory that contains your VM folder. My VM is “WindowsXP.vbox” and it is stored in the directory /Users/DolceMusic/VirtualBox/WindowsXP. So I go to /Users/DolceMusic/VirtualBox and drag the folder “WindowsXP” to its new location. Because VirtualBox no longer has any knowledge of this VM, you will not get a UUID error.
Now that your VM is in its new location, you need to let VirtualBox Manager know about it.
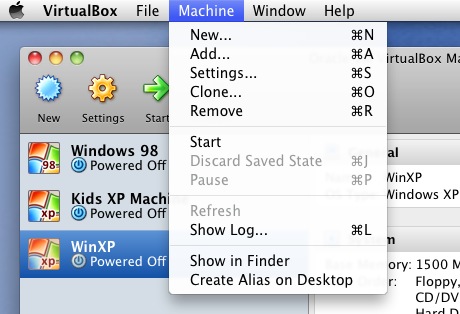
Go to the menu called “Machine” and select the item “Add…” (see image below).
Select the machine you want to add, and click the “Open” button (or press Return). You VM is now ready to go in its new location.
The VDI that contains the guest operating system, however, is still in its original location. To move that, you will go through steps analogous to what you did to move the VM — you will remove the record of your VDI from VirtualBox, move the VDI file, and then add the VDI back to VirtualBox from its now location. Before you move the VDI, you want to be certain which VDI you need to move. When you select a virtual machine in VirtualBox Manager, you will see a lot of information about that VM, including the drives that it uses.
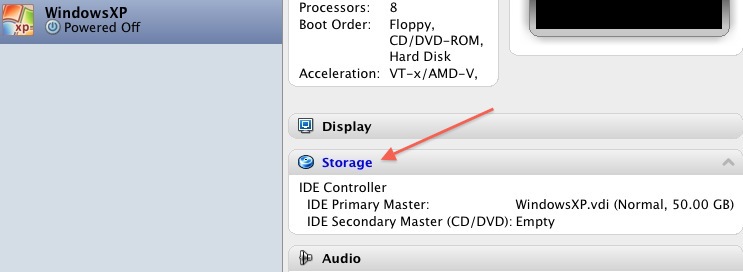
Click the label that says “Storage,”
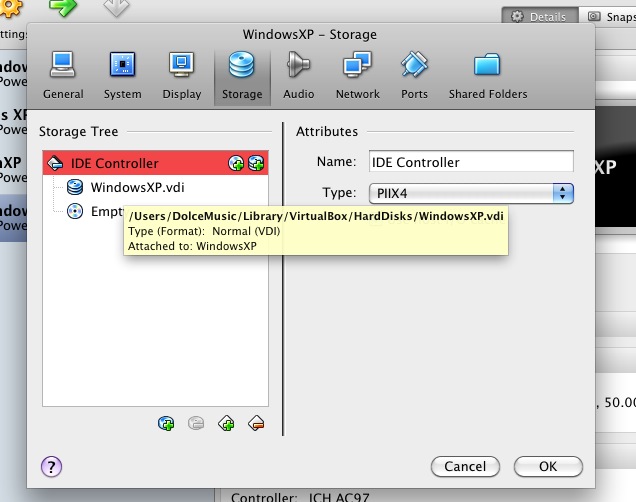
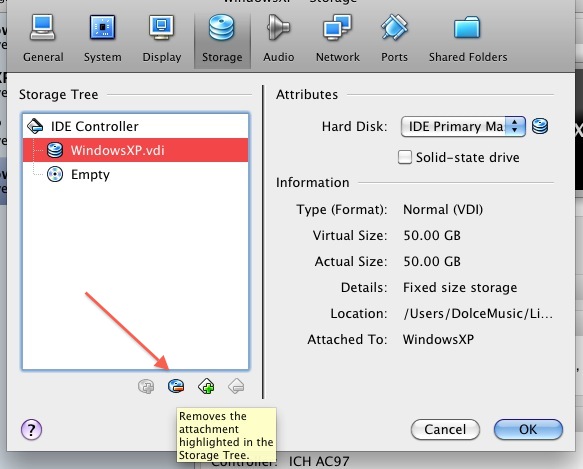
and you will be taken to the following screen. Hold your mouse over the name of the VDI, and an info popup will tell you the path to that VDI.
Now you need to detach the VDI from any virtual machines that use it. Select the VDI under the IDE Controller tree and click the button with the minus sign, and then click OK.
You have now told the VMs to forget all about the VDI, now you have to tell VirtualBox itself to forget about it.
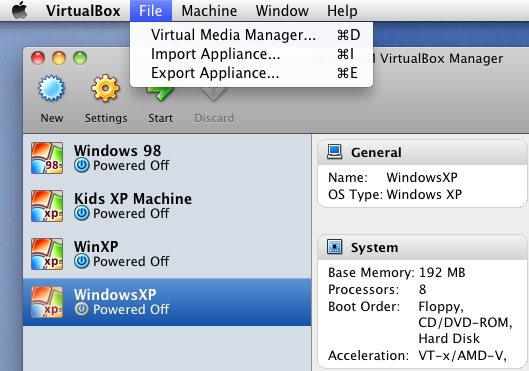
Go the the File menu and select “Virtual Media Manager.”
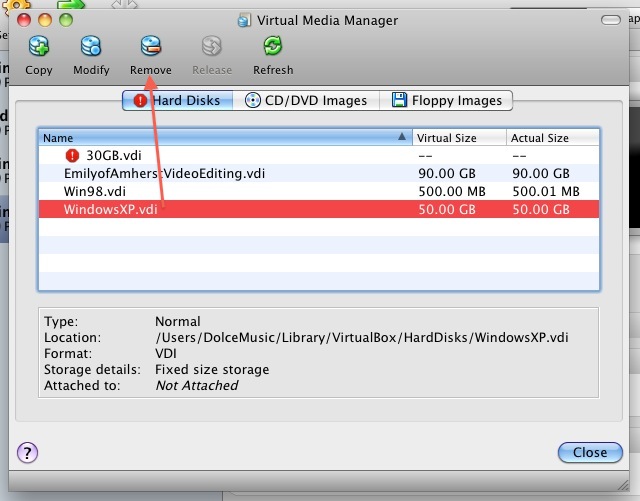
Select the drive you want to remove, and click the “Remove” button.
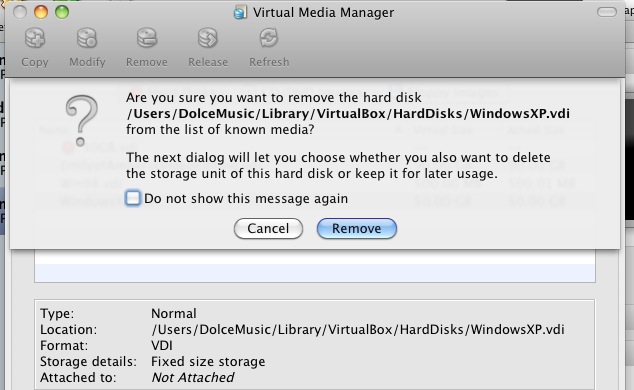
You will see the following message:
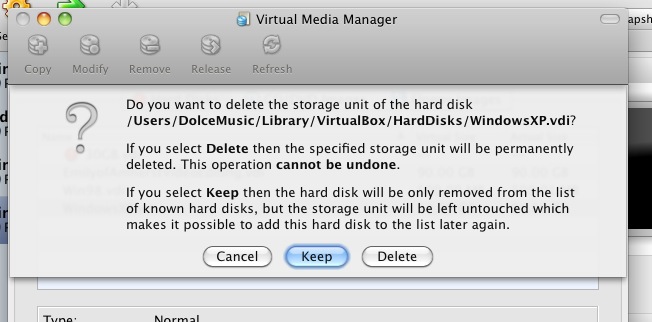
Select “Remove” and you will see this message:
I want to move the VDI, so I select “Keep.” The VDI is now a non-entity as far as VirtualBox is concerned, so you can move/rename to your heart’s content. I want my VDI in the same directory as the VM that uses it, so I move it there.
After the VDI has completed its move, you need to tell VirtualBox about it again. Use your file manager to find the VDI file and drag it to the Virtual Media Manager. That’s it. Now you must reattach the VDI to the VM that uses it. Close Virtual Media Manager to return to VirtualBox Manager. Select that VM that uses the VDI, and click the label that says “Storage” (the same place you went to Remove the VDI as described a few lines above).
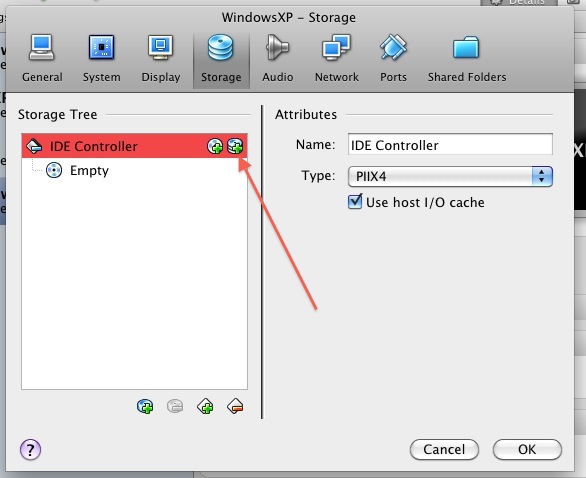
Click the button to add a hard drive (image below)
You will have the option of creating a new disk or opening an existing one. Select Open and Existing One, find the VDI you want to add, click OK, and your VM is ready to go.
You have moved your VM and your VDI, there have been no UUID errors, and there was no XML editing necessary. (At least, all this is true for me. If you have any problems, please let me know.)
